we began some workshops with simon on how to use illustrator and the tools that it offers.
Simon, with the help of some simple exercises, guided us through the methods of using the pen tool in order to trace, outline and create shapes. i had an understanding of how to use the pen tool prior to the lesson but it helped me understand more about how i could use it to a greater success.
the first task was to trace various lines ans shapes to gain an understanding of anchor points and using the handles to change the angle of a curve. i found this really easy and was finished within minutes which i was surprised about and proud of.
we then had to trace a lower case g which proved more difficult because of the ear and bottom counter. after the trace (left hand g) we had to try and replicate it with the pen tool and the elipse tool but without the template. using the pathfinder tool we then had to put the separate shapes together to make the right hand g. i am really proud of my own attempt and think that it resembles the original g well.
. .
in the second lesson we looked at some of the more advanced tools and how we could manipulate shape and form with them.
using the various shape tools to make different shapes, and filling them with colour, we then used the blend tool to create a path of evolution between the two shapes. we then went on to manipulate the strands with various other tools like the direct selection tool (to change line and edge), the warp tool (to warp and contort shapes), and the width tool (to play with widths and weights).
we then went on to look more in depth at the width tool and its ability to alter a letter form to add/remove serifs, change weights, change curvature and so on. i particularly like my manipulated F and think that it has a cool feel to it.
Simon went on to show us how to utilize the various strokes available through the brush/pen tools. i think this was a really important learning curve as im quite interested in the strokes and lines made by the hand and so it was helpful to see how this could be done digitally.
. .
having gained a basic understanding of the various tools illustrator has to offer we were given the Illustrator Brief.
'Produce an alphabet based on one of the letterforms you created from the Alphabet Soup: Visual Thinking Brief.'
the word i was given in the visual thinking brief was 'Dissect'. i used Mongolian Balti as my base font and from that produced a set of 10 'dissected' letterforms.
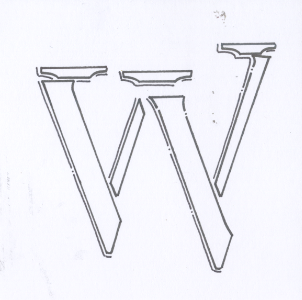
i decided that i would use the 'W' as a starting point to the brief. i like how the W looks and is formed and felt that it would be an interesting place to begin my investgation.
i began by tracing the original W (above) in photoshop using the pen tool. this enabled me to manipulate the shapes with illustrator.
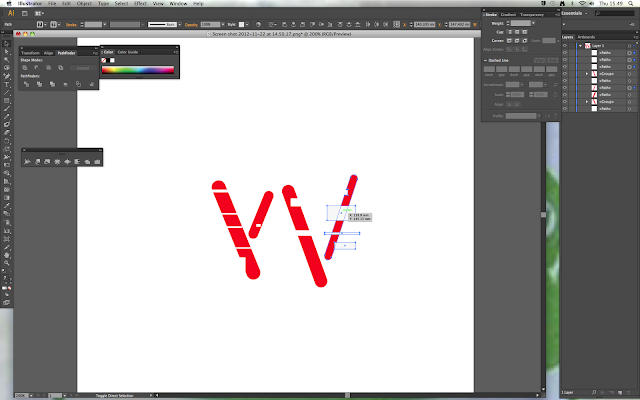
i then began experimenting with different tools and how they might affect the letter.
i started just using the width tool and the other ones in that category, like the warp tool and the cristalize tool. all made interesting marks but really decreased the legibility of the letter and so i decided that over use of shape changing tools might not be successful.
i decided to go back to the base shape and try using the direct selection tool and add anchor tool to change the basic shapes.
i like some of the curves made when i added new anchor points but all in all didnt really like how the letter forms came out.
having hit a bit of a design block i decided to look more at the letter itself. the font Mongolian Balti, while suitable for the visual thinking brief, was, in my opinion, too formal for what i had in mind for the illustrator and i think this is what was throwing me off. i began to change the font by first removing the serifs and then rounding off the corners so the formation of each part was softer and more to my liking.
although a much simpler form, i feel as though there is much more design potential. this is likely due to it being more of a 'blank canvas' now, making it easier for my head to think and my eyes to see what could potentially happen.
i looked at using the pathfinder tool and creating new shapes or removing parts of a shape from two or more separate shapes. i really liked this idea and so experimented with the various shapes, plus some of my own made, to see what i could make.

having considered some more ways of changing the look of the shape i decided that i was happy with pursuing the theme of adding and removing parts of a letterform via the pathfinder tool and different shapes. i tried the same thing on some other letters but found that it was difficult to get a good balance between the font and the removal of parts. after a variety of lengthy attempts at designing something i liked, and failing to achieve any success, i realised that the font i was using was the main reason why i wasn't progressing. i think the serifs were the main block but also the fact that Mongolian Balti is a very straight and formal font and i didn't want these aspects as themes to run with. i tried to maintain the font and work with it but after i had decided that the font wasn't working it was hard for me to make any progress. i decided that it would be more appropriate to consider a new font but with the same themes that i wanted to pursue (using shapes to remove sections of the letter).
i wanted to work with a font that was fun and playful and that offered more curvature in form. i made an investigation into what fonts i could use and ended up settling on the uppercase Skia body font. im really glad i made this decision because from this point my ideas flowed so much more naturally.
i began by outlining all the letters with the pen tool.
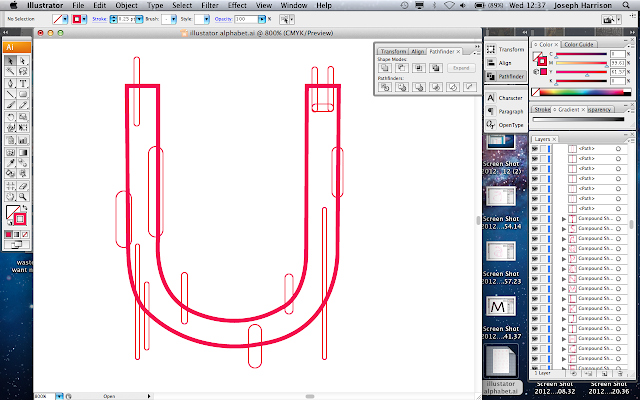
using the rounded elipse tool i added shapes to various point over each letter and then proceeded to use the 'minus-front' option on the pathfinder to make one shape out of many that was my letterform.
being that my traces only showed the outline of each letter i thought it necessary to add some sort of counter and in doing so realised that i could incorporate a lowercase version of each letter within the letter itself. this idea did prove difficult in the letters without counters but i decided it would be a cool thing to incorporate anyway and i liked the way it came out.
having completed the altering of each letter in terms of removing bits with the shapes i decided to use the warp tool to alter the leaning and formation of the letters. i think this added that little bit extra to make by illustrator typeface what i wanted it to be.
im really happy with my completed design and i think that its a good exploration of the design possibilities illustrator has to offer. im glad we were given this brief as i feel my ability to use illustrator has improved so much. i know more about the basic components and can navigate myself much more competently around the programme, enabling me to access a digital form of design that i previously neglected.