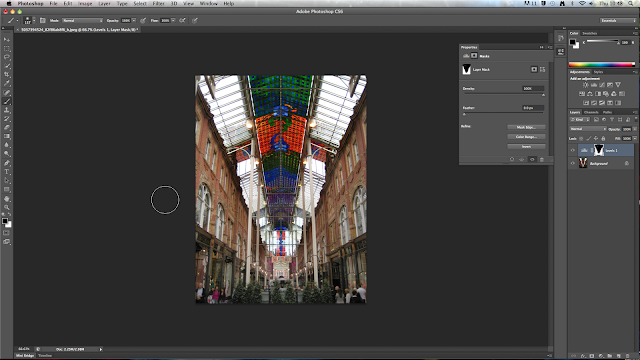
looking at how to work with image in non destructive way-so that i can go back and chancge something.
to see how something will look when printed go image>mode>cmyk so i can see print version. that is a destructive trasformation
use history panel in top right corner to get back to original-only works before saving
use view panel at top to do non destructive way- do view>proof colours(check proof setup first) cmd+Y
gamut is the same as range "can you proof me this image in the rgb gamut"
"out of gamut" out of a specific colour range being used
view>gamut warning will highlight all colours out of range in that gamut (shows as grey)
in bottom right corner is a circle with half fill n half empty-use this to change things in non destructive way
cmyk-generally bright blues n greens cant be recreated. more reds.
can use hue/saturation to try and recreate colours lost from gamut range
check image is correct size, resolution, and colour mode before start a piece
the white box is a layer mask. white because it applies to everything on the image at that point. can make it so only some of image is targeted. can use paint brush to change it.
the white of the box is black now where the adjustment has happened.
W gives you quick selection tool. use it to select a part of an image
file>automate>panorama
today we had another session with simon.
a smart object is a way of having something different but combined in photoshop but then you can go back and change it.
what a smart object looks like
go to layer>smart objects>stack mode
to paste part of a p[hoto over another photo. use the rectangular marquee tool to select the whole photo then copy the photo and paste it onto the other photo. then use the direct selection tool to select the part that you want to keep then go on select>inverse and then cut the rest of the image.
PDF=portable document format.
how to make a contact sheet. file>automate>contact sheet 2
. .
after explaining the more detailed intricacies of the techniques we had learned about simon gave us the photoshop brief and explained what we had to do.
we were each given a shape (mine being triangle) of which we had to pictorially explore within the college building. i started by documenting various photos of the college but not being shape specific. using the technique simon had showed us of how to make a contact sheet, i put my initial photos into photoshop to produce them.
although some photos were a bit rushed i felt i gained a good initial study of the college structure that i could then go in to more depth concerning triangular formations within the building.
after taking more photos of triangles that i found around the college, of which i was really happy with, i proceeded to upload them to the computer to then be manipulated in photoshop using the tools and methods we had learned about.
using the polygonal lasso tool (for a lot of my designs) i selected a section of the image in a triangle shape and then cut it, down scaled it and placed it back in the same position to give the effect of negative space in the shape of a triangle.
using the quick selection tool while holding shift so only straight or 45 degree angled lines could be drawn i created a triangle involving pattern out of the image which i then took away from the image. using various image adjustment tools, messing around with hue/saturation and contrast etc, i was able to manipulate parts of the image which could then be layered back on to create a single image with different aspects in different styles.
my final designs.
im really happy with my final designs because i think they work well as a set and successfully answer the brief. i think they all look aesthetically pleasing in their own ways and im really pleased with how they all came out. most of all im impressed with my learning in this project. before we began i was a photoshop novice at best. i listened in each tutorial and followed the instructions and from them continued my own practice in photoshop. i feel that i have really learned a lot in terms of how photoshop works and am now much more competent at using it as a digital design tool.


No comments:
Post a Comment